Tutorial 0a: CTSM, CESM-Lab, & Git
Contents
Tutorial 0a: CTSM, CESM-Lab, & Git#
This tutorial is an introduction to:
CTSM and its CLM configuration
Logging onto CESM-Lab, a preconfigured environment with the Community Earth System Model and Jupyter Lab that’s running in the cloud for purposes of this tutorial; and
Using GitHub to clone the code base for Community Terrestrial Systems Model (CTSM) into your cloud environment.
NOTICE: These steps are required before you can work on the materials provided in the rest of the tutorial.
1. CTSM#
CTSM is the Community Terrestrial Systems Model and is the land component of the Community Earth System Model (CESM). There are several configuration options of CTSM and throughout this tutorial we will use the Community Land Model (CLM) configuration which is the climate and biogeochemistry mode of CTSM. CTSM can be run in many different configurations and options, depending on the needs of any individual project.
Additional information about CTSM and CLM is available on the website, including technical documentation, a user’s guide, and a quickstart guide for running various model configurations beyond what is covered in this tutorial.
2. CESM-Lab#

CESM-Lab Basics#
CTSM and CESM require computing resources that can be complicated to set up on new computing systems, a personal computer, or in the cloud. CESM-Lab is available via containers and cloud platforms to allow researchers to easily run CTSM and CESM on their own systems or on-demand in the cloud.
What is a container? And what is the cloud?#
A container is preconfigured, portable application that can reliably run on any computing infrastructure.
The cloud is rentable infrastructure available on-demand - at the moment, only AWS is supported, but Azure & GCP will be added later.
This tutorial uses a Jupyter Notebook. A Jupyter Notebook is an interactive computing environment that enables the creation and sharing of documents that contain discrete cells of text or documentation and executable code, including plots. It allows users to access, run, and edit the code in a browser. To interact with this notebook:
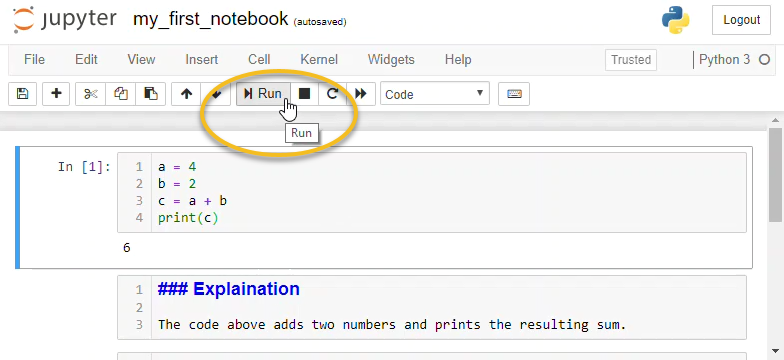
Execute or “run” cells of executable code (cells denoted with ‘[ ]:’) using the play button in the menu at the top (see below image)
The results of running code, such as plots, will appear below that cell
Each step must be followed in order, otherwise you may encounter errors
For more information on Jupyter notebooks please see the Jupyter Notebook Quick Start Guide.
2.1 Logging onto CESM-Lab#
If you’re using a CESM Lab container for this tutorial, you shouldn’t need to do anything to log in other than launch and access Jupyter. If you’re using the cloud, however, you should be able to access it via the URL or IP address of your session. For the 2022 CTSM Workshop, this is located at:
https://ctsmworkshop2022.cesm.cloud
Once on that page, just enter the username and password you were given. If you need one, contact the organizers for the workshop or training session.
- The Software Carpentry page has a helpful tutorial.
- There are a number of cheatsheets that summarize the basic commands like this, or this. You can also look for one you like.
2.2.1 Open a terminal window within CESM-Lab#
Click on the
+symbol in the upper left for a New LauncherClick on the Terminal icon

Try some simple commands in your terminal window#
pwd for your current directory
ls to see what else is in this directory
cd .. to move up one directory
ls to see what else is in this directory
This should mirror the directory structure you see in the sidebar of your Jupyter Lab window.
NOTICE: If you’re familiar with running CTSM on an HPC system, like Cheyenne, you’ll notice suble differences in the directory structure for the CESM-Lab container that we’ve set up for the cloud.
If you’re using this tutorial but running on an HPC system (rather than the cloud) the directory structure won’t exactly match what’s illustrated in this tutorial.
Move onto part three where you’ll clone CTSM from GitHub
3. Let’s ‘Git’ started with GitHub! 😉#
All of the software and new code developments that go into CESM and CTSM are publically available through different GitHub repositories. You can find information, track conversations, create issues, and learn lots about what’s going on with CTSM development through the CTSM GitHub repository and the associated wiki.
Git is an open-source version control software to track your changes in the source code.

GitHub provides a centralized online service to host the source code and version control using Git.
Learning all the tricks and features of Git and GitHub takes some time to figure out. We will only use basic features here, but can suggest a few places to start learning more about these powerful tools.
This tutorial from software carpentry provides a hands-on tutorial for Git and GitHub.
The CTSM wiki page on GitHub also has useful information and tools for your reference
Navigate to the link for CTSM on the GitHub repository: https://github.com/ESCOMP/CTSM
If you click on the green Code button, you’ll see an http link can be used to clone the CTSM code.

3.1 Clone the CTSM repository
This is a one-time step to download the latest development branch of CTSM.
The url below should match what you copied from the CTSM GitHub repository.
To Do:#
Clone and set up CTSM in your home directory:
Run the cell of the notebook below OR your can type the following into the terminal window. This will clone and set up CTSM in your home directory:
cd ~
git clone https://github.com/ESCOMP/CTSM.git
cd CTSM
./manage_externals/checkout_externals
echo ' -- Finished cloning CTSM -- '
Cloning into 'CTSM'...
remote: Enumerating objects: 72220, done.
remote: Counting objects: 100% (486/486), done.
remote: Compressing objects: 100% (215/215), done.
remote: Total 72220 (delta 295), reused 405 (delta 264), pack-reused 71734
Receiving objects: 100% (72220/72220), 38.40 MiB | 39.96 MiB/s, done.
Resolving deltas: 100% (54831/54831), done.
Processing externals description file : Externals.cfg
Processing externals description file : Externals_CLM.cfg
Checking status of externals: clm, fates, cism, rtm, mosart, mizuroute, ccs_config, cime, cmeps, cdeps, cpl7, share, mct, parallelio, doc-builder,
Checking out externals: clm, Processing externals description file : Externals_CLM.cfg
Checking out externals: fates,
ccs_config, cime, cdeps, Processing externals description file : Externals_CDEPS.cfg
Checking out externals: fox, genf90,
cism, Processing externals description file : Externals_CISM.cfg
Checking out externals: source_cism,
cmeps, cpl7, mizuroute, mosart, rtm, mct, parallelio, share,

 -- Finished cloning CTSM --
In the steps above you accomplished the following
cd ~= change to your home directorygit clone...= clone the CTSM code into a new directory with that name..checkout_externals= gets additional code from external repositories like FATES, cime, mosart, and others that CTSM needs to run.
Congratulations!#
You’re ready to start running simulations with CTSM! Next you can move onto the Day 0b Tutorial: CTSM Simulations at NEON Tower Sites